You don’t need $2,000 to create a workspace that actually works. Whether you’re a student setting up your first desk, a remote worker on a tight budget, or just someone who refuses to overspend, building a complete desk setup for under $300 is absolutely possible.
I’m not talking about a bare-bones setup that falls apart in six months or leaves you with back pain after a week. This is a real, functional workspace with everything you need: desk, chair, display solution, peripherals, and the basics to stay organized and comfortable.
The secret isn’t buying the cheapest version of everything. It’s knowing where you can save money without sacrificing function, and where spending an extra $20 makes a massive difference in daily comfort.
This guide breaks down a complete under-$300 setup with real products you can buy today, explains why each choice matters, and shows you how to allocate your limited budget for maximum impact.
Image credit: TechBlock
[Back, adjustable height, ergonomic lumbar support chair]
The Budget Breakdown: Where Your $300 Goes
With only $300 to work with, every dollar needs to pull its weight. Here’s the strategic allocation:
- Desk: $50-80 (20-25% of budget) – Stable and the right size
- Chair: $70-90 (25-30% of budget) – Your back matters most
- Monitor: $80-110 (30-35% of budget) – Skip if you have a laptop
- Keyboard + Mouse: $20-30 (8-10% of budget) – Reliable basics
- Lighting: $15-25 (5-8% of budget) – Prevents eye strain
- Organization: $15-25 (5-8% of budget) – Cable management essentials
This framework ensures you don’t overspend on aesthetics while neglecting comfort or function.
The Complete Setup: Product by Product
Foundation: The Desk ($50-80)
Recommended: IKEA Linnmon/Adils Combo – ~$55
The IKEA Linnmon top (47″ or 59″ wide) paired with Adils legs is the budget desk that refuses to quit. Yes, it’s particle board. Yes, everyone has one. But here’s why it works:
The 47-inch version gives you enough space for a monitor, keyboard, and mouse with room for a notebook or coffee cup. The surface is smooth, easy to clean, and comes in several colors (white, black, beech effect). The height is standard 29 inches, which works for most people between 5’4″ and 6’2″.
The Adils legs aren’t the most stable system ever built, but they’re fine for normal use. For extra stability, add a 5th leg in the middle back—it costs $5 and makes a noticeable difference.
Alternatives if IKEA isn’t accessible:
- Mainstays Basic Student Desk ($45-60 on Walmart)
- Ameriwood Home Dakota L-Shaped Desk ($75-85 on Amazon) for corner spaces
The desk is NOT where you should get creative on a $300 budget. Get something simple, stable, and the right size.
Comfort: The Chair ($70-90)
Recommended: Amazon Basics Mid-Back Mesh Office Chair – ~$75
This is your most important purchase. A $40 chair from a big box store will destroy your back within weeks.
The Amazon Basics Mid-Back Mesh Office Chair hits the sweet spot for budget ergonomics:
- Adjustable height (critical for proper desk ergonomics)
- Lumbar support (positioned correctly)
- Mesh back (keeps you cooler than cheap padding)
- Padded seat (comfortable for 4-6 hour sessions)
- Armrests (fixed position, but better than none)
Is this as good as a $400 ergonomic chair? No. But it’s exponentially better than generic student chairs at the same price point.
Proper adjustment matters: When you sit, feet should be flat on the floor, thighs parallel to ground, and armrests should allow elbows to rest at 90 degrees.
Alternative: Furmax Office Chair ($65-80) or IKEA Flintan ($60-70)
If you’re sitting for more than two hours daily, invest in the proper chair now. Your future self will thank you.

Image: Sihoo
Display: Monitor or Laptop Solution ($80-110)
Your display choice depends on what you already own.
If you already have a laptop: Use it as your main display initially with a laptop stand ($15-20) to bring the screen to eye level. Add an external keyboard and mouse for better ergonomics. This saves $100 for other priorities.
If you need a monitor: Acer SB220Q 21.5″ – ~$90
For under $100, the Acer SB220Q gives you everything needed:
- 21.5-inch IPS panel with true 1080p resolution
- IPS technology for better viewing angles than cheap TN panels
- Thin bezels that look more expensive than they are
- HDMI included
- 75Hz refresh rate (slightly smoother than standard 60Hz)
Yes, 21.5 inches is relatively small by today’s standards. But it’s better to have a quality smaller screen than a cheap larger screen with terrible color accuracy.
Position properly: Top of screen at or slightly below eye level, about 20-25 inches from your face.
Alternatives:
- ASUS VA24EHE 24″ (~$100-110) for slightly larger display
- Amazon Basics Laptop Stand (~$18) if using laptop as display
[Acer SB220Q 21.5″ IPS Monitor – 1080p, 75Hz, ultra-thin bezels]
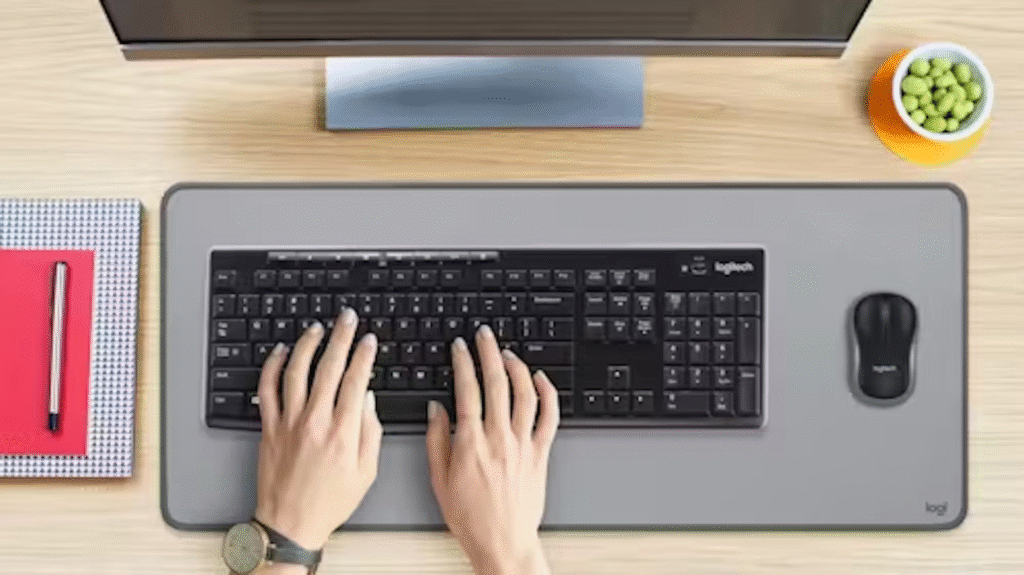
Peripherals: Keyboard and Mouse ($25-35)
Recommended: Logitech MK270 Wireless Combo – ~$25
Unless you’re gaming competitively or typing 10+ hours daily, you don’t need fancy mechanical keyboards or high-DPI gaming mice. You need comfortable, reliable, wireless peripherals.
The Logitech MK270 combo delivers:
Keyboard: Full-size layout with number pad, quiet keys, spill-resistant, 2-year battery life
Mouse: Comfortable ambidextrous design, precise optical tracking, 1-year battery life
Best part? One tiny USB receiver connects both devices—only one port used.
Alternatives:
- Amazon Basics Wired Keyboard + Mouse ($15-20) to save $10
- Logitech K380 + M330 (~$45) for slightly better quality
Lighting: Basic Task Lamp ($15-25)
Recommended: LEPOWER Metal Desk Lamp – ~$20
Eye strain from poor lighting will ruin even the best setup. A basic desk lamp is non-negotiable.
The LEPOWER Metal Desk Lamp provides:
- Adjustable arm and head to point light exactly where needed
- LED bulb included (energy efficient, doesn’t get hot)
- Stable base that won’t tip over
- Classic design that works with any aesthetic
Position your lamp to the side of your monitor (opposite your dominant hand) so it lights your desk without creating screen glare. Right-handed? Put lamp on your left.
Alternative: Globe Electric LED Desk Lamp ($18-22) or clip-on LED lamp ($12-15) for limited desk space
[LEPOWER Metal Desk Lamp – Adjustable arm, LED bulb included, stable weighted base, classic design]
Organization: Cable Management ($15-25)
Recommended: Basic Cable Management Kit – ~$15
Even budget setups need cable management. A clean workspace helps you focus, and organized cables last longer.
Get a kit that includes:
- Cable clips (route cables along desk edges)
- Velcro straps (bundle excess cable length)
- Cable sleeve (hide multiple cables running together)
- Adhesive holders (keep charging cables within reach)
Management strategy: Mount your power strip under your desk with command strips. Use cable clips to route monitor and lamp cables along the back edge. Bundle excess cable length with velcro straps. Use cable sleeve for cables running to floor outlet.
Also include:
- Simple mouse pad ($5-10) – Protects desk surface
- Small desk organizer ($5-10) – Keeps pens and small items corralled
Total for organization: $15-25
The Complete Setup: Total Cost
Here’s the full breakdown with recommended products:
| Item | Product | Price |
|---|---|---|
| Desk | IKEA Linnmon/Adils 47″ | $55 |
| Chair | Amazon Basics Mid-Back Mesh | $75 |
| Monitor | Acer SB220Q 21.5″ | $90 |
| Keyboard + Mouse | Logitech MK270 Wireless | $25 |
| Lamp | LEPOWER Metal Desk Lamp | $20 |
| Organization | Cable Kit + Mouse Pad | $18 |
| TOTAL | $283 |
That leaves you $17 under budget for tax or shipping, or to upgrade one component slightly.
Image Source: makerstations.io
Alternative Configurations
Configuration A: The Laptop User ($245)
Skip the monitor, use your existing laptop:
- Desk: IKEA Linnmon – $55
- Chair: Amazon Basics Mesh – $75
- Laptop Stand: Amazon Basics – $18
- Keyboard + Mouse: Logitech MK270 – $25
- Lamp: LEPOWER – $20
- Organization: Cable kit – $18
- Extra accessories: Desk shelf – $35
Configuration B: The Gamer on Budget ($290)
Use existing TV temporarily as monitor:
- Desk: IKEA Linnmon 59″ (wider) – $65
- Chair: Amazon Basics Mesh – $75
- Gaming Mouse: Logitech G203 – $30
- Gaming Keyboard: Redragon K552 – $35
- Lamp: Basic LED – $18
- Headphone Stand + Cables – $22
- Large Mouse Pad – $25
- Add proper 144Hz monitor later
Configuration C: The Minimalist ($280)
All-white aesthetic:
- Desk: IKEA Linnmon White – $55
- Chair: IKEA Flintan White – $65
- Monitor: Acer SB220Q – $90
- Keyboard: Logitech K380 White – $35
- Mouse: Logitech M330 White – $18
- White Desk Lamp – $22
- White cable kit + mouse pad – $25
What’s NOT Included (And Why That’s Okay)
Let’s be honest about what this budget doesn’t cover:
Standing desk: Electric models start around $200—that’s your entire budget before adding a chair. Focus on proper sitting ergonomics first.
Dual monitors: A second monitor adds $90-120 minimum. Master single-monitor workflows first, then upgrade.
Premium chair: Herman Miller and Steelcase chairs cost $400-1,200. The Amazon Basics chair serves you for 6-12 months while you save.
Aesthetic accessories: Plants, RGB lighting, fancy desk mats—all lovely, none essential. Add personality once function is covered.
The beauty of this foundation is upgrading individual components over time. Your first upgrade should probably be the chair (after 6-12 months) or adding a second monitor.
Making Your Budget Setup Last
With proper care, this $300 setup should serve you well for 1-3 years:
Desk care: Use a desk mat to protect the particle board surface. Wipe up spills immediately—moisture damages particle board once the veneer chips.
Chair maintenance: Tighten bolts every 3-4 months. The Amazon Basics chair uses standard bolts that loosen with use. Five minutes with an Allen wrench keeps it stable.
Monitor longevity: Never use harsh cleaners. Microfiber cloth dampened with water is sufficient. Keep drinks away from electronics.
Cable management: Reassess routing every few months when adding devices. Tangled cables strain connectors and shorten device lifespan.
Upgrade strategy: Upgrade one component at a time, starting with whichever bothers you most—usually the chair or desire for a second monitor.
Where to Buy Everything
IKEA direct: For the desk (in-store pickup ideal—shipping is expensive for furniture)
Amazon: For chair, monitor, peripherals, lamp, and accessories (Prime shipping gets everything within days)
Walmart or Best Buy: Alternative sources for monitors if Amazon stock is low
Used marketplace: Facebook Marketplace or Craigslist for desks and chairs at 50% off retail. Avoid used monitors (dead pixels) and peripherals (hygiene).
Sales timing: Wait for these periods if not in a rush:
- Back to school (July-August) – Office furniture and electronics
- Black Friday (November) – Monitors and peripherals
- Prime Day (July) – Amazon Basics products
- New Year (January) – Desks and chairs
Your Upgrade Path
Once budget allows, here’s the smart upgrade sequence:
Upgrade 1 ($100-150): Better chair OR second monitor (choose based on pain points)
Upgrade 2 ($50-100): Standing desk converter (FlexiSpot risers start around $100)
Upgrade 3 ($50-80): Better peripherals (mechanical keyboard or ergonomic mouse)
Upgrade 4 ($30-60): Improved lighting (monitor light bar or LED strips)
Upgrade 5 ($500-800): Complete desk replacement (electric standing desk)
Upgrade 6: Premium chair (used Herman Miller Aeron or Steelcase Leap)
The Bottom Line
Building a complete desk setup for under $300 requires making smart compromises, not cutting corners.
Smart compromise: Simple IKEA desk instead of motorized standing desk
Cutting corners: $30 folding table that wobbles
Smart compromise: Laptop stand with existing laptop instead of buying monitor immediately
Cutting corners: Hunching over laptop directly on desk
Smart compromise: Basic but properly ergonomic chair
Cutting corners: Sitting in dining chair for eight hours daily
The setup outlined above makes only smart compromises. You’re getting a real, functional, comfortable workspace that happens to cost under $300.
Start here. Use this setup for 6-12 months. During that time, you’ll learn exactly what matters to you in a workspace. Maybe you’ll discover you need a second monitor. Maybe standing desk capability becomes essential. Maybe RGB lighting becomes your personality.
Whatever direction your setup evolves, this foundation gives you a stable, functional starting point. And that’s worth way more than blowing $2,000 on a setup that looks good but doesn’t fit your workflow.
Your workspace doesn’t need to be perfect. It needs to be functional, comfortable, and yours. This $300 setup delivers on all three.
[IMAGE PLACEHOLDER: Final inspirational shot showing complete budget setup in use – person working comfortably at desk, good posture, proper lighting, organized workspace. Conveys that budget doesn’t mean sacrifice. Product: Full IKEA Linnmon desk setup with Amazon Basics chair and Acer monitor]