The difference between a desk setup that looks professional and one that looks chaotic almost always comes down to one thing: cable management.
You can have the most expensive standing desk, the fanciest gaming chair, and a gorgeous ultrawide monitor, but if there’s a rats nest of cables visible behind your setup, it ruins the entire aesthetic. Worse, tangled cables aren’t just ugly—they’re a practical nightmare that makes cleaning difficult, creates tripping hazards, and can even damage your equipment.
I’ve helped hundreds of people transform their workspace cable situations from disaster zones to clean, organized systems. The good news? Cable management isn’t complicated or expensive. It just requires a plan and the right tools.
This guide walks you through the complete cable management process, from planning your cable routing to selecting the best products for your specific setup. Whether you’re dealing with a simple laptop workspace or a complex multi-monitor gaming battlestation, these strategies will work.
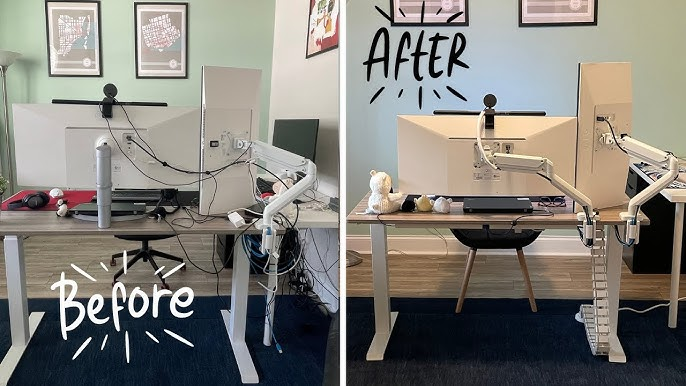
Image: SHELTECH
Why Cable Management Actually Matters
Cable management isn’t just about aesthetics. Organized cables mean easier cleaning, longer equipment life (no strain on connectors), safer workspace (no tripping hazards), simpler troubleshooting, and better mental clarity. Visual clutter genuinely affects focus.
The investment—usually $20-40 in materials and 1-2 hours of your time—pays dividends every day you use your workspace.
Step 1: Assess Your Cable Situation
Before you buy anything or start organizing, you need to understand what you’re dealing with.
Count and Measure Your Cables
List everything that needs power or data connection: computer, monitor(s), lamp, phone charger, speakers, peripherals. Then note each cable’s actual length versus the distance it needs to travel. That excess length is what creates tangled messes.
Also identify your desk type: against wall (easiest), center of room (needs floor routing), standing desk (needs slack), or L-shaped (multiple routing paths). This determines which solutions you’ll need.
[Cable Management Starter Kit]
Step 2: Plan Your Cable Routing
The biggest mistake people make is trying to organize cables without a plan. Then they end up rerouting everything when they realize their approach doesn’t work.
The Three-Zone Strategy
Think of cable management in three zones:
Zone 1: Under-Desk (power and excess cable length)
This is where your power strip lives and where you bundle and hide excess cable length. The goal is getting cables off the floor and out of sight.
Zone 2: Desk Surface (active use cables)
Cables you interact with regularly—phone charging cable, headphone cable—need to stay accessible but controlled. You don’t want these falling behind your desk every time you unplug them.
Zone 3: Behind/Wall (cables traveling to outlets)
For cables that must run from your desk to wall outlets or other locations, you want them routed cleanly along walls or under carpet edges, not snaking across the floor.
Sketch Your Cable Paths
Seriously, draw this out. It doesn’t need to be artistic—a simple top-down view of your desk with lines showing where cables will run.
Mark:
- Where your power strip will mount (under desk, usually centered or where most cables can reach)
- The path from desk to wall outlet
- Where cables enter/exit your desk area
- Where you’ll bundle excess cable length
This 5-minute sketch will save you from buying the wrong length cable tray or mounting your power strip in a spot where half your cables can’t reach it.
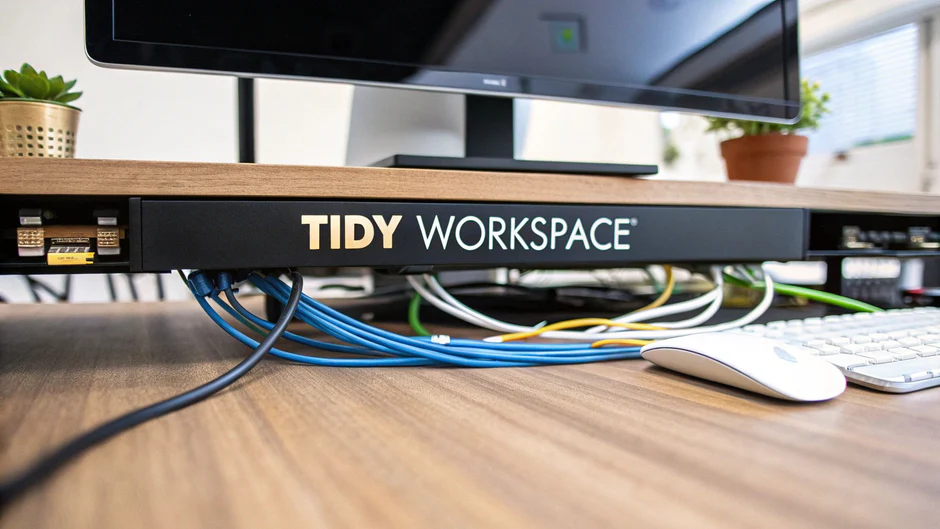
Image: Mount-It!
Step 3: Choose Your Cable Management Tools
You don’t need expensive solutions, but you do need the right tools for your situation.
Essential Tools for Every Setup
Under-Desk Cable Tray ($15-30)
A metal wire or plastic tray that mounts under your desk provides a place to route cables and hold your power strip. This single addition makes the biggest visual impact.
Look for:
- Width: 16-20 inches (wide enough for a power strip plus cables)
- Length: 24-48 inches (depending on your desk width)
- Weight capacity: 10-15 lbs (handles power strip plus cables)
- Tool-free mounting (clamps to desk edge) OR includes mounting hardware
Recommended: J Channel Cable Tray (~$20) or Stand Up Desk Store Under-Desk Tray (~$25)
Velcro Cable Ties ($8-12 for 50-pack)
Reusable velcro ties are superior to zip ties for cable management. You can adjust them easily when adding or removing cables.
Get multiple sizes:
- 6-inch ties for bundling 3-5 cables together
- 8-inch ties for larger bundles or thicker cable groups
- 12-inch ties for securing cable bundles to desk legs or trays
Cable Clips ($6-10 for 20-30 pack)
Adhesive cable clips attach to your desk, wall, or desk legs to route individual cables exactly where you want them.
Types you’ll use:
- Small single-cable clips (for routing monitor cables along desk edge)
- Multi-cable clips (holds 2-4 cables in one clip)
- Drop cable clips (keeps charging cables from falling behind desk)
Get more than you think you need—they’re cheap and having cables exactly where you want them makes a huge difference.
Cable Sleeve/Wrap ($10-15)
A neoprene or braided sleeve that bundles multiple cables together while remaining flexible. Especially useful for cables running from your desk down to floor outlets.
Look for:
- 1.5-2 inch diameter (handles 6-10 cables comfortably)
- 6-10 foot length (enough to run from desk to floor)
- Split design OR open weave (easier to add/remove cables)
Situation-Specific Tools
For Standing Desks: Cable Management Spine or J-Channel
Standing desks create a special challenge—cables need slack for the desk to rise without pulling or stressing connections.
Solutions:
- Cable spine that attaches to desk leg and manages slack
- J-channel tray that travels with the desk height
- Extra slack loops secured with velcro ties
Budget: $20-40 for dedicated standing desk cable management
For Desk Against Wall: Adhesive Cable Raceway
If your desk is against a wall and you want cables to run up the wall to outlets or down the wall from mounted monitors, use adhesive cable raceways.
Get:
- Paintable PVC raceways that blend with wall color
- 1-2 inch width (handles multiple cables)
- Includes corner pieces for clean 90-degree turns
Budget: $15-25 for a complete raceway kit
For Gaming/RGB Setups: Cable Comb or Loom
If you have RGB cables, fan cables, or just want cables to look extremely organized and parallel, cable combs or braided cable loom creates that custom-PC aesthetic.
Budget: $10-20 for combs or premium loom
[cable management tools – under-desk tray]
Step 4: The Cable Management Process
Now that you have your plan and tools, here’s the step-by-step execution.
Phase 1: Disconnect Everything (Yes, Really)
This seems drastic, but trust me—trying to organize cables while they’re all plugged in is a nightmare.
Take photos first: Before unplugging anything, photograph your current setup from multiple angles. This helps you remember what connects where.
Label if needed: If you’re dealing with many identical cables (multiple HDMI cables, multiple USB cables), use painter’s tape and a marker to label ends before disconnecting.
Unplug and remove everything: Take all cables completely off your desk. This is your chance to clean the desk surface thoroughly.
Phase 2: Install Under-Desk Infrastructure
Mount your cable tray: Follow manufacturer instructions to attach tray under your desk. Position it where your power strip will have slack to reach all devices.
Mount your power strip: Use adhesive strips or screws (if allowed) to attach power strip inside the cable tray. Orient outlets based on plug directions—if you have bulky power adapters, make sure they have space.
Test the mounting: Give it a firm tug. Under-desk mounts fail when cables are pulling on them, so make sure it’s secure.
Phase 3: Route Power Cables First
Power cables form the foundation of your routing.
Identify the path: From each device to the power strip under your desk, figure out the route. Usually along desk edge, down desk leg, into cable tray.
Use cable clips for routing: Attach clips along your planned path before running cables. Then snap cables into clips as you route them.
Bundle excess length: Once cables reach the power strip, any excess length gets bundled with velcro ties and stored in the cable tray. Don’t just stuff excess in there—create neat loops.
Plug in but don’t turn on yet: Connect all power cables to the strip, but leave devices off while you work on data cables.
[Heavy-Duty Power Strip with Mounting Brackets]
Phase 4: Route Data Cables
With power sorted, add your data cables.
Monitor cables: These typically run from monitor to computer. Route them together along the back of your desk, secured with clips or bundled with velcro if they’re parallel.
Peripheral cables: Keyboard, mouse, webcam—these connect to your computer. Bundle these together if they’re traveling the same path.
Keep some separation: Don’t bundle power cables tightly with data cables. While modern cables are shielded, keeping them somewhat separated prevents any potential interference.
Use cable spine or sleeve: For cables running from desk down to floor, feed them through a cable sleeve to bundle them together cleanly.
Phase 5: Manage Desktop Cables
Some cables need to stay on your desk surface for regular access.
Charging cables: Use drop cable clips to hold your phone charging cable in place so it doesn’t fall behind the desk when unplugged.
Headphone cable: If you have wired headphones, use a cable clip or small hook to keep the cable organized when not in use.
Leave appropriate slack: Don’t route desktop cables so tightly that they restrict movement. You need enough slack to pick up your phone or move your headphones without pulling.
Phase 6: Final Path to Wall Outlet
Now tackle the cable run from your desk to the wall outlet.
If desk is against wall: Cables can drop straight down behind the desk. Use adhesive cable clips on the wall or desk back to guide them down neatly.
If desk is in room center: You need to run cables across the floor. Use a cable sleeve to bundle them, then either:
- Run sleeve under area rug if you have one
- Use floor cord covers (plastic ramps that protect cables)
- Route along wall baseboards instead of straight across room
Keep floor cables safe: If cables cross walking paths, they must be secured or covered. Tripping hazards cause injuries and damage equipment.

Image: desky.com
Step 5: Test and Adjust
With everything routed and plugged in, test your setup.
Power on everything: Make sure all devices receive power and work correctly.
Check for strain: Look for any cables pulled tight or bent at sharp angles. Add slack or reroute if needed.
Adjust cable heights: Standing desk users, raise and lower your desk through its full range. Cables should have enough slack to accommodate this without pulling.
Add missing clips: You’ll probably notice spots where a cable clips would help. Add them now while you’re aware of it.
Take new photos: Document your organized setup. This helps if you need to disconnect things later for cleaning or upgrades.
Maintenance and Future-Proofing
Cable management isn’t “set it and forget it.” Plan for maintenance and future changes.
Quarterly Check-In
Every 3-4 months:
- Dust your cable tray and bundles (dust accumulates on cables)
- Check velcro straps for loosening
- Verify adhesive clips are still stuck firmly
- Look for any cables that have worked loose
Adding New Devices
When you add something new to your setup:
- Route its cables following your existing system
- Don’t take shortcuts—maintain the organization
- Add new velcro ties or clips as needed
- Re-bundle if necessary to incorporate new cables cleanly
The “One In, One Out” Rule
When upgrading equipment, remove old cables completely. Don’t leave obsolete cables “just in case” you need them—they create clutter and confusion. Store unused cables in a drawer or box away from your active setup.
Common Cable Management Mistakes
Using zip ties: They must be cut to adjust. Always use velcro instead.
Bundling too tightly: Leave breathing room for air circulation and slight cable movement.
Permanent solutions when renting: Use adhesive and clamps, not drills.
Hiding before testing: Test everything works before finalizing routing.
Ignoring cable length: If a cable is way too long, buy a shorter replacement.
No slack for standing desks: Need 24-30 inches extra slack beyond minimum reach.
Cable Management for Different Setup Types
Minimalist Setup
For simple setups (laptop, maybe one monitor, few accessories):
Focus on:
- Small cable clips to route few cables cleanly along desk edge
- Simple cable sleeve from desk to outlet
- Desktop cable drop clips for charging cable
- Budget: $15-25 total
You don’t need under-desk trays for minimalist setups—often clips and a sleeve are sufficient.
Gaming/Streaming Setup
For complex setups (multiple monitors, PC, peripherals, lighting, audio gear):
Invest in:
- Large under-desk cable tray (20″+ wide)
- Heavy-duty power strip with 10-12 outlets
- Multiple cable sleeves for different cable groups
- Premium velcro ties in various sizes
- Adhesive raceways for RGB cables
- Budget: $50-80 total
Gaming setups have the most cables, so invest in proper infrastructure from the start.
Standing Desk Setup
Special considerations for adjustable desks:
Must have:
- Cable management spine or traveling J-channel
- Extra slack in all cables (24″+ beyond minimum reach)
- Cable loops secured to desk legs with velcro
- Proper routing that doesn’t interfere with desk movement
- Budget: $30-50 total
Test your standing desk cable management through full range of motion before finalizing.
Going Wireless: Reducing Cable Count
The ultimate cable management is fewer cables. Easy wins: wireless keyboard/mouse (eliminates 1-2 cables), Bluetooth headphones (one less cable), wireless charging pad (cleaner desk surface).
The trade-off: wireless devices need charging. You’re trading cable simplicity for battery management. For most people, wireless peripherals are worth it—just keep one wired backup mouse for emergencies.
The Bottom Line on Cable Management
Clean cable management isn’t about perfection—it’s about having a system that:
- Keeps cables out of sight
- Prevents tangling and damage
- Allows easy access when needed
- Can be maintained long-term
- Accommodates future changes
You can achieve this with $20-40 in supplies and 2-3 hours of work. That initial investment pays off every single day you use your workspace.
Start with the basics: under-desk cable tray, velcro ties, and cable clips. These three tools solve 80% of cable management challenges. Add situation-specific solutions (standing desk spine, wall raceways, sleeves) based on your needs.
The satisfaction of looking under your desk and seeing organized cables instead of chaos is genuinely rewarding. And when someone comments on how clean your setup looks, you’ll know it’s not just the equipment—it’s the invisible organization holding everything together.
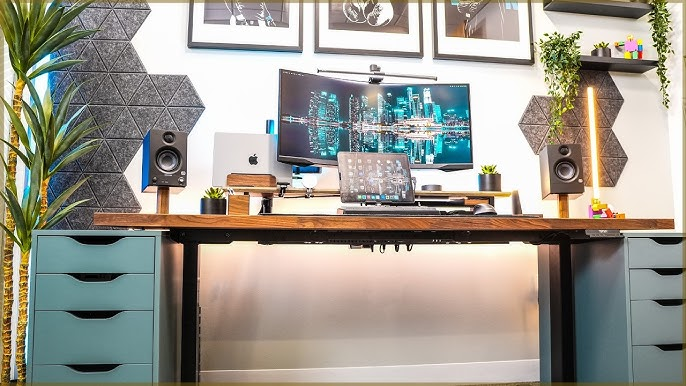
Image: Caimar Salizi